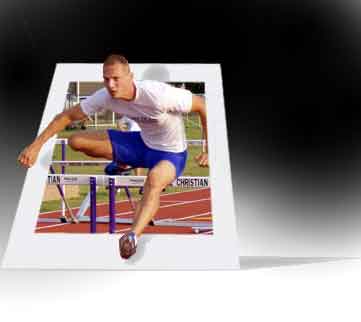
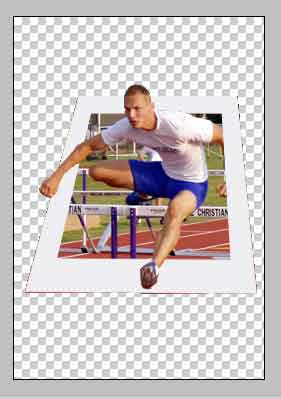
Jumping Out of a Frame
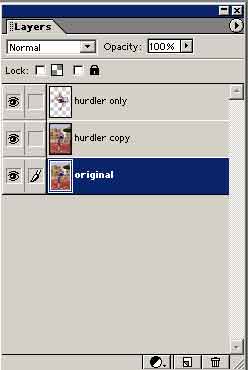
There are a lot of steps in this tutorial. Make sure you look at the layer palette as it evolves from one step to the next.
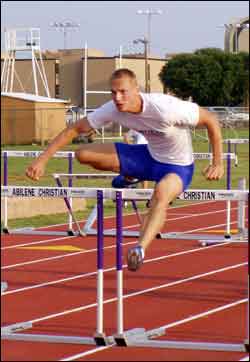
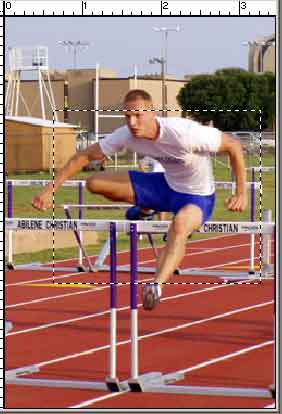
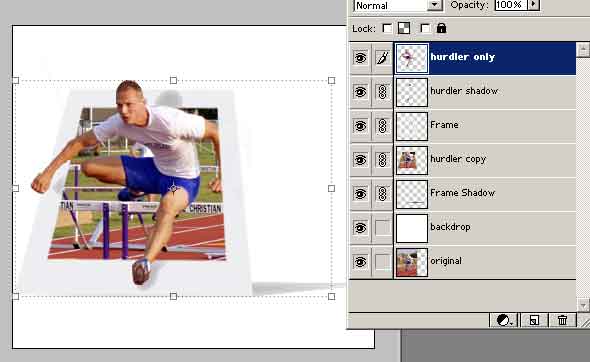
1. Click on above thumbnail, and copy it into Photoshop. Name the layer Original. Duplicate the layer and name it Hurdler Copy. Select the hurdler (I used Polygon Lasso) and go to Layer>New>Layer via Copy. Call this layer Hurdler Only. Zoom in close and clean up the edges with an eraser. Your palette will look like this:
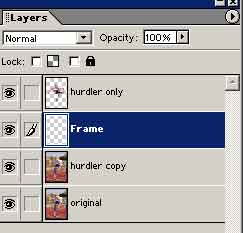
2. Framing the Hurdler:
Click the Hurler Copy layer and use Layer > New > Layer or control+shift+N to create a new layer in between the Hurdler Only and the Copy. Name it Frame. Click OK.
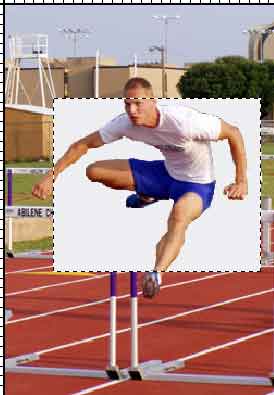
3. Use the Rectangular Marquee (M) and draw a box similar the one below.
4. Go to the Foreground color and select an off-white. I chose #EEEEF1...you can choose another but keep it white-ish in tone. Now use Edit > Fill, set the contents to foreground color and click OK. Add some texture by going to Filter > Noise > Add Noise, set to around 1%, Monochromatic and Gaussian.
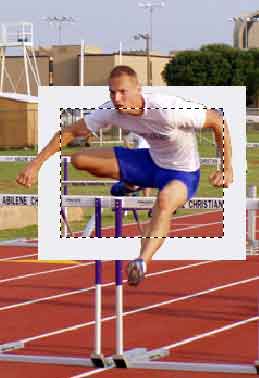
5. Right now we have a box but we need to create our frame from it. With the box still selected, go to Select > Modify > Contract. I used a value of 20. Click OK, you will now have a smaller selection inside the box. Hit the delete key to remove the central part of the square. Deselect the "ants".
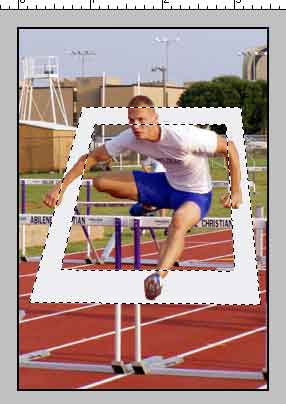
6. We will distort the frame to help add depth to it. Ctrl + T...Make
sure you are in the Frame layer. Hold down Ctrl and drag the top
left and right handles inward, and the bottom left and right handles outward.
Try to keep the hurdler's left arm and foot overlapping but within the frame's
white area. (See example below.) When you're happy with the shape, hit the
return key or double click inside the bounding box to set it.
7. Time to remove the background. Select the Magic Wand (W) tool. While the Frame layer is active click somewhere outside the frame. You will see that the whole area around it is now selected. Click the Hurdler Copy layer to make it active and 'poke out' the eye of the original layer. Now hit the delete key. Go to Frame layer and Ctrl+Click it to select the frame. Now select the Hurdlers Only layer, pick the Eraser (E) and remove the section of the hurdler's arm. Clear the selection before moving on to the next step. Your picture should like the one below.
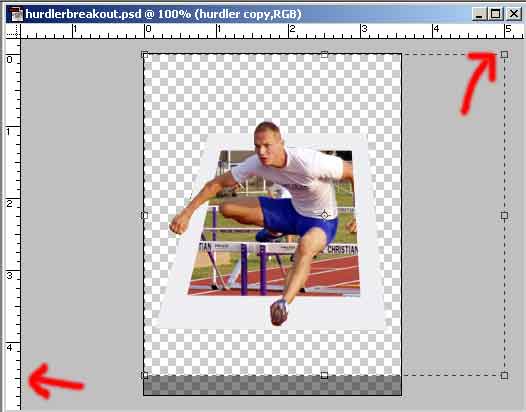
8. We will now create more room for the hurdler. We could resize the hurdler but instead we will resize the canvas so we can learn a new skill. We will crop the picture larger. Using the crop tool, go to the upper left corner, click and drag until you get to the other side of the canvas and release. Then drag outside into gray area to the 5-inch mark for the top ruler guide and 4.5" on the left ruler guide as indicated with red arrows. See this step below. Hit the Enter key.
9. Create a new layer above the hidden background layer and fill it with white; Edit > Fill > Contents > White and click OK.
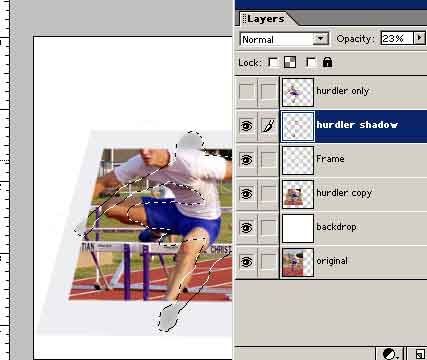
10. Copy Hurdler Only layer...this will be our cast shadow. Name it: Hurdler Shadow. Hit the "D" key to load the default colors. Ctrl+Click the Hurdler Shadow layer to load the selection; then Alt+Backspace to fill with Black (Foreground Color). Drag below Hurdler Only layer and Ctrl + T to transform...Use the Control key and click and drag the top corner. See Below.

10. Use the Eraser (E) Block to erase the shadow that's inside the picture frame and on the right side of the frame. The frame's right side won't have a cast shadow since the arm is still inside the picture. Apply a Blur>Gaussian Blur to 4 pixels. Reduce the opacity to around 20-25%. Deselect ants.
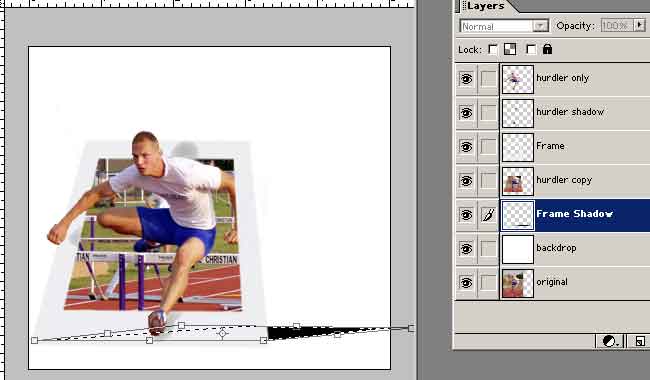
11. Now let's give the frame a similar cast shadow by applying the same techniques: Copy the Hurdler Copy layer, name it properly (Frame Shadow), load the layer (ctrl+click), use default colors, alt+backspace, drag layer below frame, ctrl+T ( free transform), hold ctrl key and drag the top handles of frame...see picture below for comparison.
12. Again, apply a similar Gaussian Blur and opacity as the Hurdler Shadow.
13. Link layers (but not the backdrop or original) and Center...See picture. Finished! You may want to color backdrop lightly or leave it white.
Final Image: