MANDALA TUTORIAL
Step One: Put your curser inside this template...Right Click to Copy this template. Open a new PS document (Ctrl + N). Ctrl + V to paste.

Step Two: Click Thumbnail below (known as Downloading) to make it larger. Copy it and Open a new PS document and Paste. Same step as above.
You will now have two PS documents opened up and untitled.
Save your template document as "mandala practice".
Remember, this is only practice so you don't need your name since it won't be turned in to me.

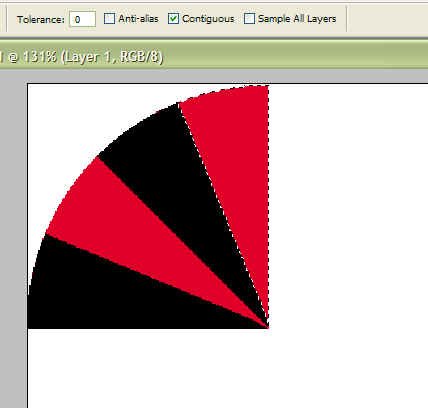
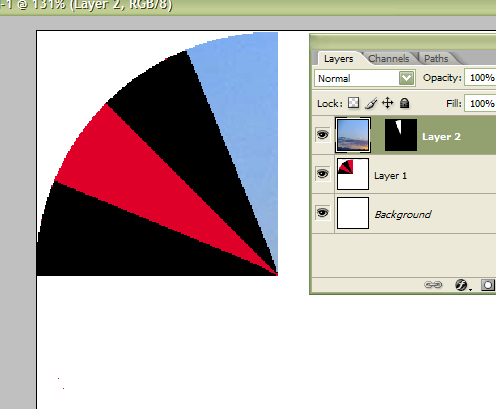
Step Three: Using the Magic Wand tool (W), click on the top red "pie piece" of your Mandala Template. See the picture below for the settings in your Option Bar before using the wand.
Then click to select.
( Notice the Tolerance level is Zero, Anti-alias is unchecked, Contiguous is checked,
and Sample All-Layers is unchecked.)
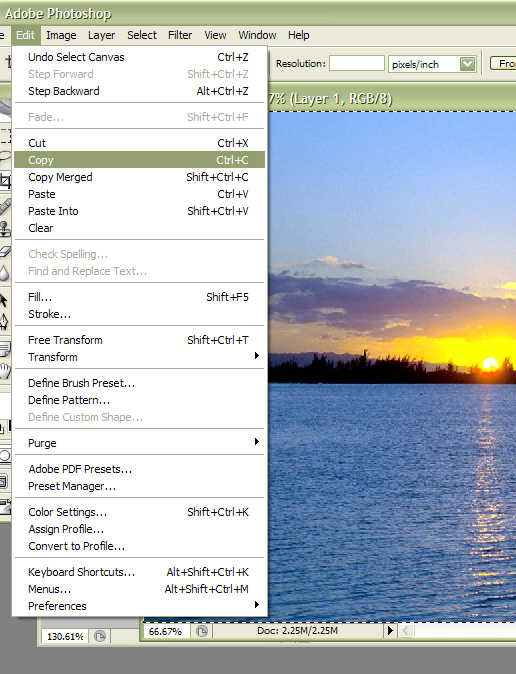
Step Four: Go to your sunset picture and use the shortcut Ctrl + A to select all.
You should see "marching ants" surrounding the photo.
Then Edit and Copy...see left picture below.
Then, go back to your Mandala Template file and choose Edit>Paste Into...
(Shift+Ctrl+V)...picture on the right.
 |
 |
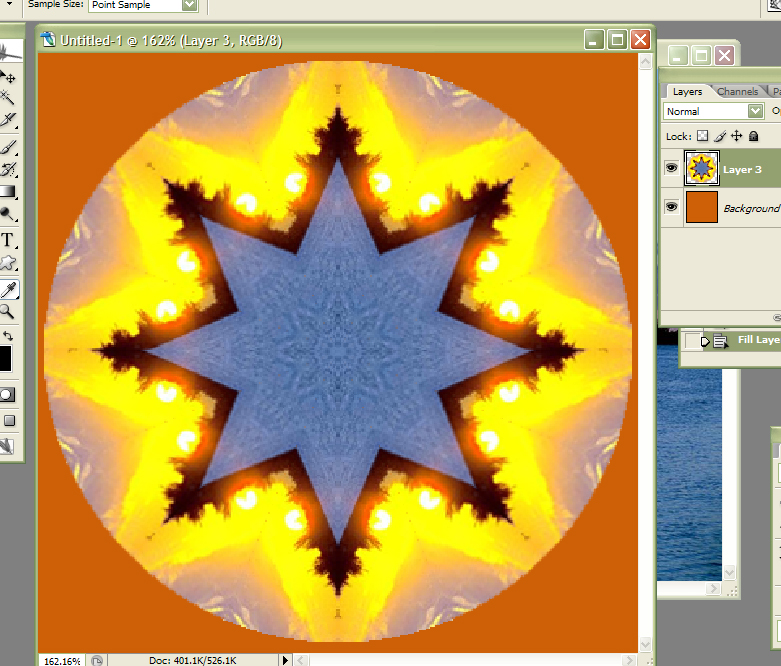
Step Five: You will have three layers now. See photo above to the right.
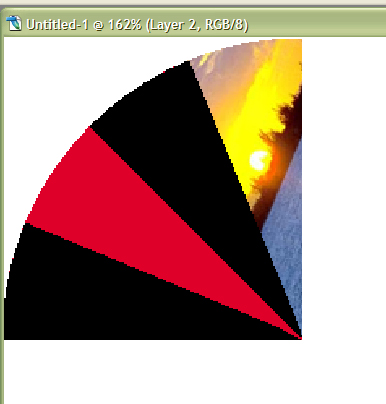
Move your sunset photo around until you find a good sample of colors in the "pie-shaped window".
You can resize and/or rotate (Ctrl + T) to get a desired result. (See mine below.)
Step Six: Ctrl + Click the black/white thumbnail in layer 2.
This will load the "ants" around your chosen picture. See mine below (a)..
Cntl + C to copy the selection.
Then, go back to layer one and Magic wand the black "pie piece" next to the red one.
See mine below (b). Once this is done, use the command, Paste Into.
See the result of the next screen shot below (c).
Notice that there's a Free Transform (Ctrl + T) box around the new picture. Do this and right click...
Choose Flip Horizontally See next screen shot (d).
a.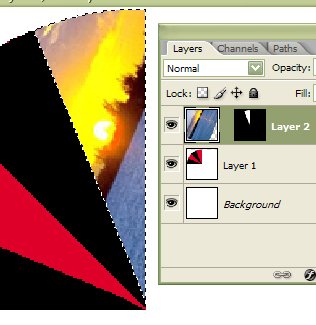 b.
b. 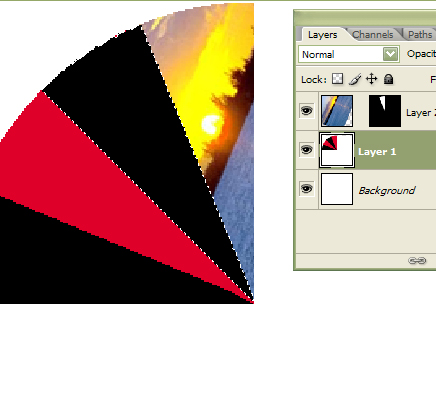
c.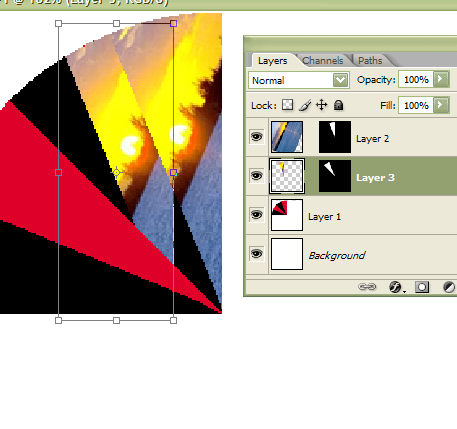 d.
d.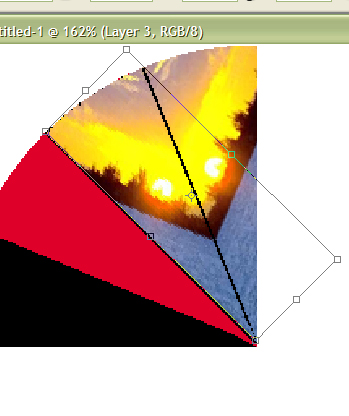
Step Seven: Now, it's important that you do your best to line things up.
We're looking for a near-perfect mirror image. This will set up the rest of your Mandala.
It will take some time to do this, and it WON'T ever be perfect, but try to get it so the template in the layer underneath becomes covered.
Sometimes it helps to turn on and off the template layer's visibility (poke the eye out!).
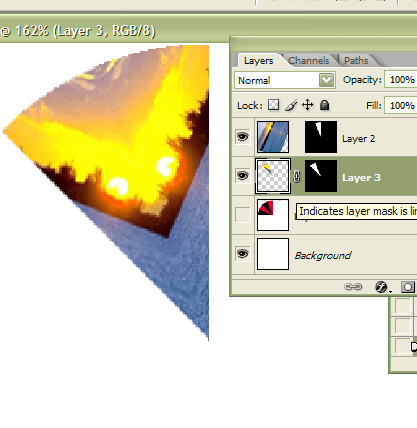
Step Eight: Notice my Layer 3 in the picture below...I added a Chain Link so that the picture can no longer move around.
Do this as soon as you've lined things up. I also poked out the eye in the template.
Now it's time to merge layers. Remember Ctrl+E? Go to Layer 4 and do this. Don't forget to apply the Transformation by hitting enter. I also trashed the template layer.
Step Nine: I merged my two layers, then copied it. See my picture below (a).
I've copied (Ctrl + J) Layer 3. At this point, I will need to take my Layer 3 copy and Transform it, and Flip Horizontally. You will now be able to form a quarter of a mandala.
See my example (b). Notice that I only have two layers? That's because I merged down again (Ctrl + E).
There are some imperfections, but try your best to cover things up.
Okay, we need to do the same steps to complete the Mandala.
a. 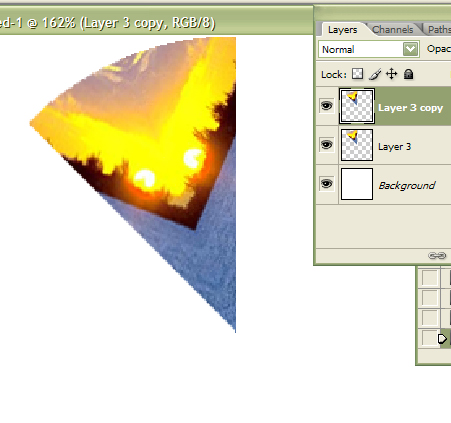 b.
b.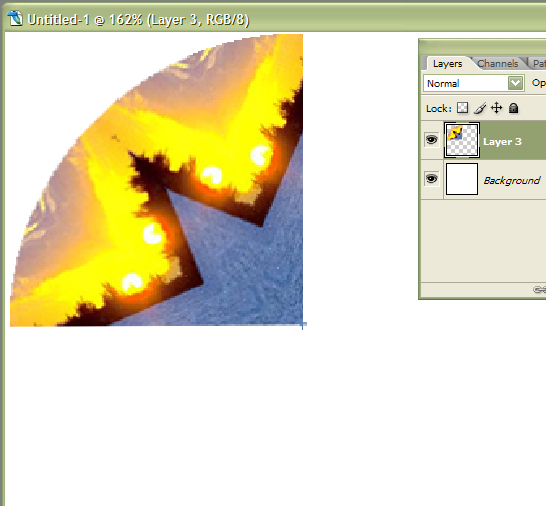
Step Ten: The next few steps will involve these commands: Ctrl + J, Ctrl + T, Flip Vertically, Nudge in place, Apply Transformation (hit enter) and Merge Down...
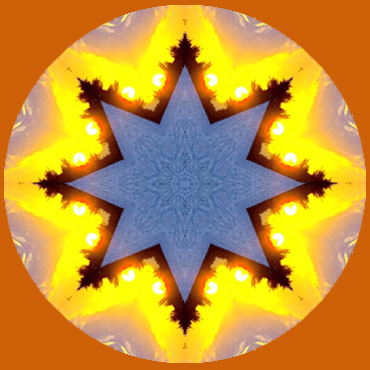
This will give us the bottom left half of the Mandala...See picture below.
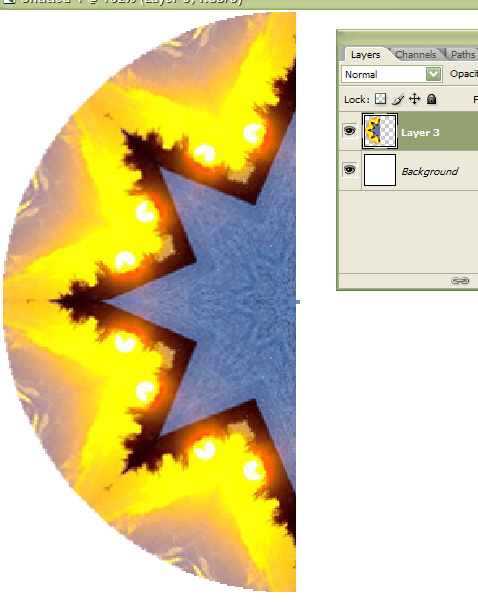
Can you do the rest to form the picture below? Notice the background color.
I used my eyedropper, chose a color in the Mandala, then I used the Alt+Backspace command.
That filled the foreground color. Viola! Finished...Don't forget to Flatten Image.