Montage
What is a Photo Montage?
Montage - A single pictorial composition made by overlapping many pictures or designs.
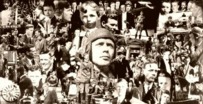
Montage of portraits of Charles A. Lindbergh, 1927 |
|
Montage of New York images following the attacks of September 11, 2001 |

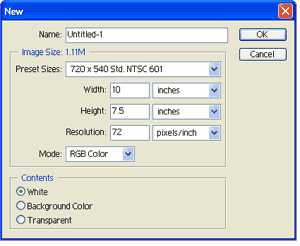
1. Create a new canvas: File>New. 7.5 inches x 10 inches is usually a full-size picture in print form. Title could be: Collage Practice or leave untitled since you will not be keeping it.
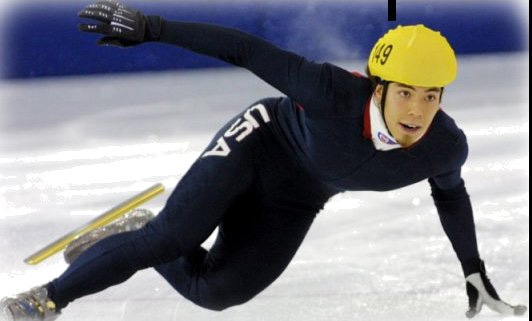
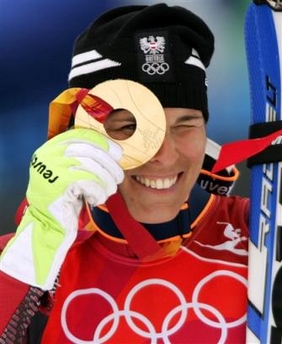
2. Our subject for this practice is the 2006 Winter Olympics.
This is my example: you may copy this or try your own arrangements using the same pictures below.

3. Decide what you want your background to be. If it is a solid color, a gradient mix of colors, or a custom design, then you need to create a new layer, name it something like “back,” and create your background. You may also decide to use an outdoor scene as your background or the one I am showing. (See pictures below).
4. Copy most, if not all of the following pictures into Photoshop. Do this one at a time. You may use one of the pictures as a background.
 |
 |
 |
|
 |
 |
 |
 |
If you use one of the pictures as a background then you'll want to resize it so it fits onto your canvas. (Don't forget to hold down the Shift Key so that the proportion is maintained.)
5. For the pictures you copy you will want to use your selection tools. As you know, there are several: magic wand, marquee, and lasso. If the picture is on a solid (or almost solid) color, or on a transparency, the best tool to use is the magic wand. When using the magic wand tool, select the solid color background, adding to the selection if necessary until all the background is selected. Then Select>Inverse, to select the actual “inside” object. Last, use the Move Tool to move the object to the working canvas.
6. Pictures with more detailed backgrounds need the “Feather” approach:
Steps to feather:
a. Using the Lasso Tool, Trace around the desired object.
b. Select>Feather.
c. Type in the desired feathering radius, usually around 15, but you may test
other numbers and see the results.
d. Click “ok.”
e. Use the Move Tool to move the selected object to the working canvas.
7. Add other pictures to complete your collage: You may want to flip your layers depending on how they look together.
8. Adding Text:
a. Select the Text Tool.
b. Type the desired words.
c. Apply text warps and blending options as desired.
d. Resize as desired with the Transform Tool: Edit>Transform.
9. Select the “Layer Styles” tab for text options like bevels and shadows.
10. To change the shape of the text, select the text tool so the text toolbar is
active. Then select the “Text Warp” tool.
11. Self Evaluate! Things to consider: a. How's the overall balance?
b. ...the contrast between images and text? c. ...your selection technique,
etc.?